tips for taking and editing photos on your phone

I'm taking the summer phone photography workshop at Big Picture Classes and I recently upgraded my iPhone (hallelujah!), so I've been taking lots of pics on my phone. I'm definitely not an expert, but I do take a lot of pictures and I edit just about every one that I end up printing or using on the blog. To process photos on my phone, I use both Instagram and Pictapgo. I've found myself using a few photo-taking and editing techniques over and over this summer, which I'm sharing today. The photos on the top or left in each series are the "before" shots. They're each followed by the edited versions.
First up: when I'm taking a photo...
Use the grid.
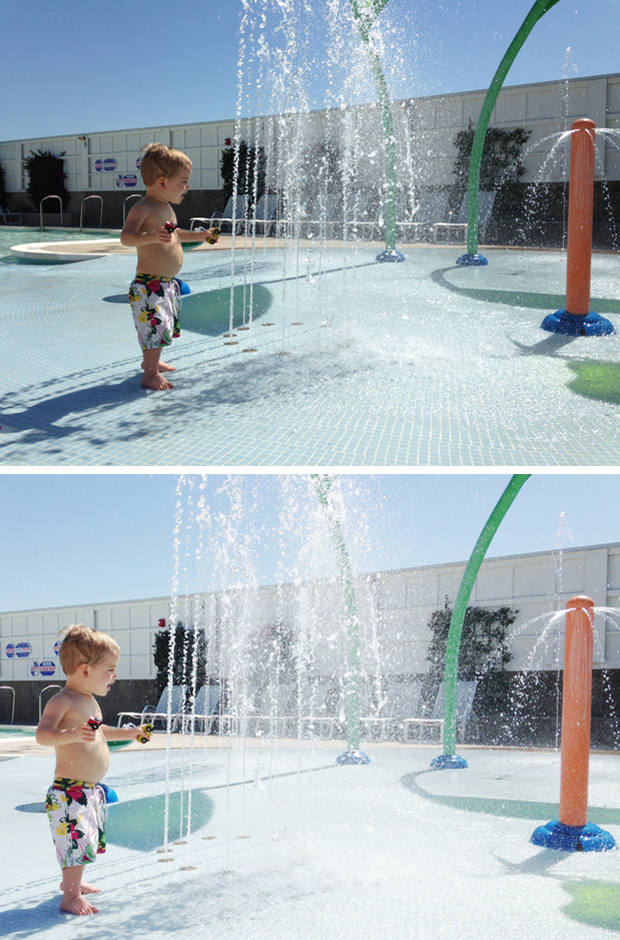
There's a feature on the iPhone camera under "options" called the grid. If you turn it on, you'll see a set of horizontal and vertical lines. I recently started using this on my phone because I used to correct the angle of nearly all my pictures in Photoshop (I have a tendency to take pictures slightly askew!). In the original photo below, I used the grid on my phone to make sure that Ben and the orange pole on the right were basically vertical. Those were my anchor points, and I used them to crop the final photo (below).
Zoom out.
I used to take a lot of close-ups, but over the last few months I've been trying to get further away from my subject. In the photo below, this allowed me to crop out a little bit of extra "stuff" in the background, and it gave me some space (the floor in the foreground) to add text if I want to do so for my project life album.

And when I'm editing a photo...
Crop.
I'm definitely not afraid to crop out some of the "noise" in my photos. I get rid of what's not necessary or the stuff that adds commotion to the picture. This also requires taking a step back and giving yourself some room to crop.
If you take pictures too close up, you may not be able to get rid of anything without sacrificing your subject.
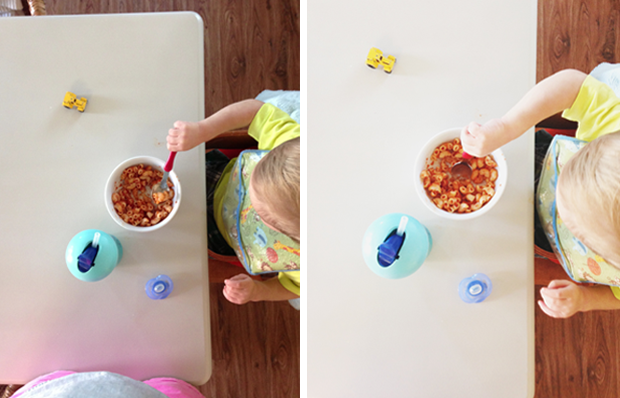
In the photo below, I straightened the angle of the table's edge and then cropped out what was unnecessary (including myself at the bottom!).
Lighten up.
As you may have noticed from the before and after shots in this post, just about every photo I take requires lightening. I know it's a personal preference, but I love that airy, bright look in photos. I try to take photos without flash and in natural light whenever possible, which helps with clarity and color (are we talking diamonds or photos here?).
In Pictapgo, I used Lights On, Air and Get Faded Neutral to achieve the lighter look in this photo of my nephew, George.

Change up the orientation.
I take a lot of horizontal photos because they fill the space when I'm putting together a slideshow or an iMovie, but for project life I use a lot of vertical photos. This often means taking what was once horizontal and making it vertical! I used the crop feature in Pictapgo to change the photo below from horizontal (landscape) to vertical (portrait). I liked the focus on Ben and the water as a backdrop.

Don't be afraid to undo.
In the photos below, the one on the left is the original. The one on the right is edited. I happen to prefer the original - no cropping, lightening or straightening necessary.
The great thing about working in an app on your phone is that it's so easy to play with a photo and then undo! Sometimes you get a great shot that doesn't require editing at all, but it's still fun to mess around with filters, actions, etc.
